Showing posts with label Baking. Show all posts

Monday, April 10, 2017

Baked Raspberry Lemonade

I had the opportunity to make cupcakes for a friend's birthday recently and decided to experiment a little with a cupcake creation. It turned out amazing, and as far as I know (I confess I haven't scoured the web to see if an identical recipe exists), this is an original recipe. I modified my favorite yellow cake recipe into lemon cupcakes, with a fresh raspberry filling and a lemon buttercream frosting.
These are a little bit of work, but they are really delicious and anything but dry and boring. They taste like a little bit of summer in your dessert!
One of the things I hate most on recipe blogs is having to scroll WAY down to the bottom to find the recipe, so let's just dive right in! (Photos at the bottom.)

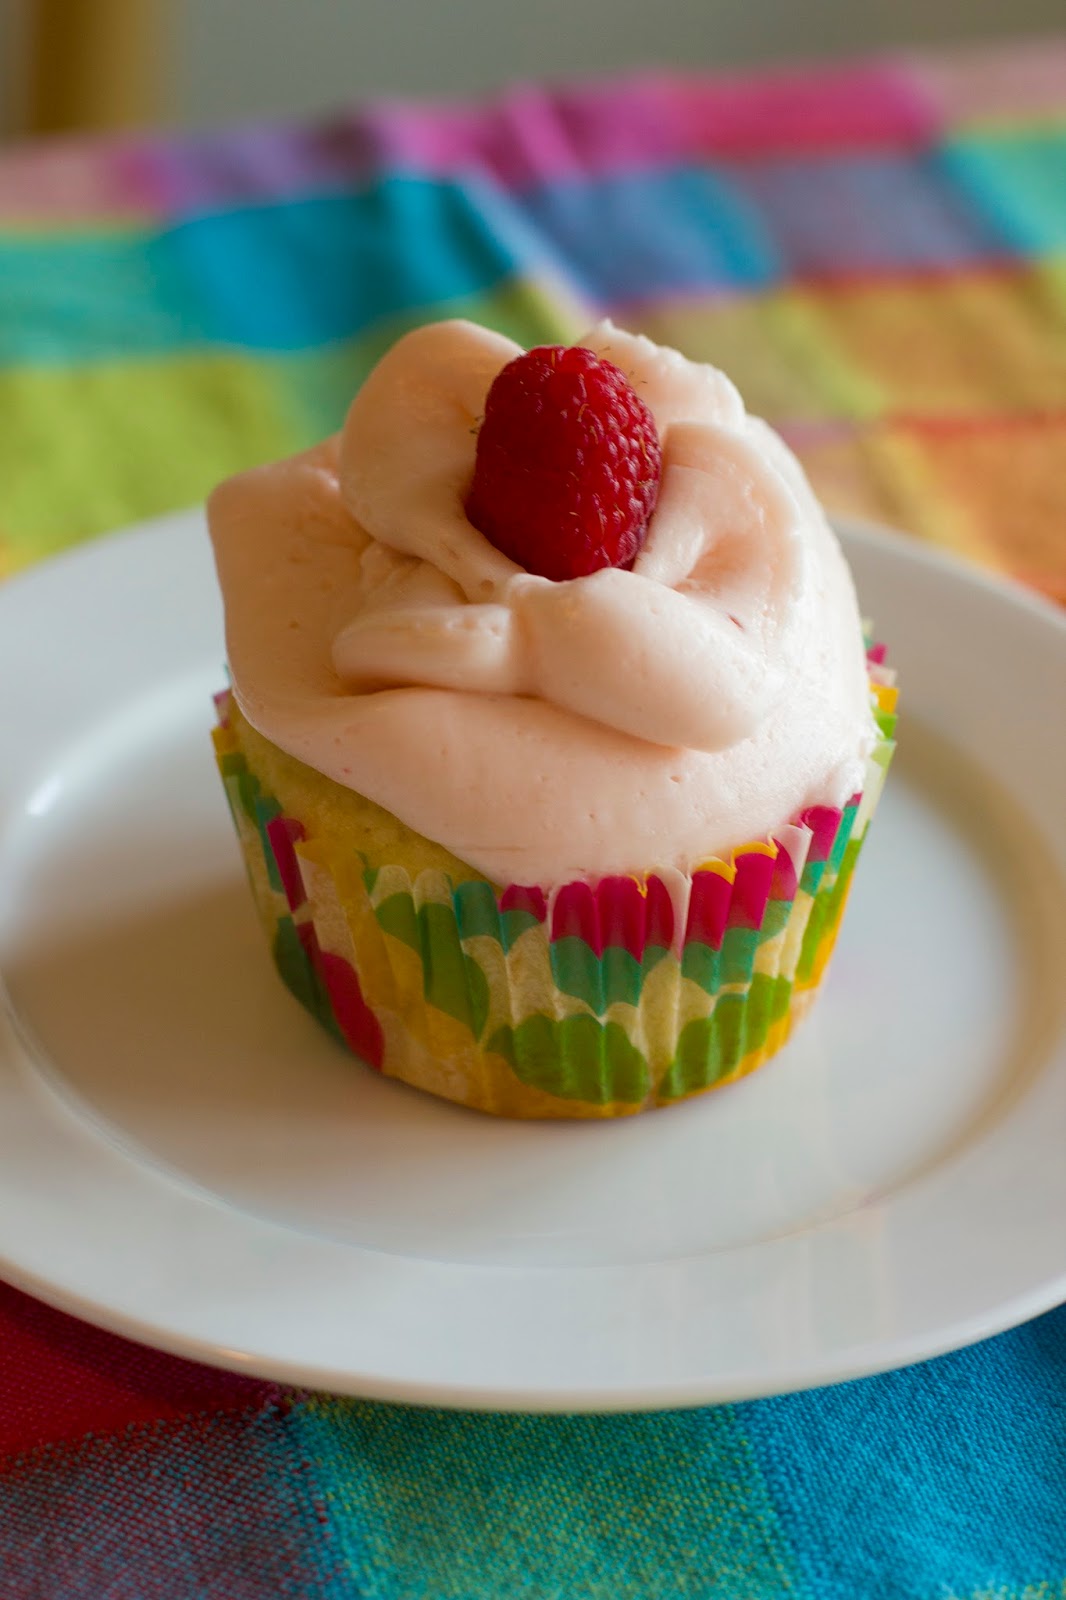
Raspberry Lemonade Cupcakes - makes 12
Preheat oven to 350*
Cake:
1/2 c coconut oil (melted)
1 c sugar
1 t vanilla
2 eggs (separated)
zest of one large lemon
juice of half lemon
1/4 t salt
3/4 t baking powder
1-1/2 c flour
1/2 c buttermilk

Instructions:
1. In a stand mixer, cream coconut oil and sugar until well combined and a little fluffy.
2. Add vanilla, both egg yolks, zest of lemon, juice of lemon and mix to combine.
3. Add salt, baking powder, half of flour, and mix until just combined.
4. Add half of milk, mix until just combine.
5. Add second half of flour, mix until just combined.
6. Add second half of milk, mix until just combined.
7. Add egg whites and gently fold until just combined.
8. Scoop into 12 muffin tins with liners - spread batter evenly between cups, should be filled a little past half-way point.
9. Bake for 15-20 minutes until cupcake comes out clean. I like to really baby them those last couple of minutes in the oven to make sure they don't get dry.
10. Let cool on wire rack while making filling and frosting.

Raspberry filling:
1 6oz package of fresh raspberries, cleaned
juice of half lemon
1/4-1/2 c sugar, depending on how sweet you want it - I like it more tart
1/4 c cold water
1 T corn starch
1/4 c heavy whipping cream

Instructions:

1. In a small saucepan on the stove, add raspberries, lemon juice, sugar. Bring to a gentle boil and stir occasionally until the raspberries have dissolved and the mixture begins to thicken a bit.
2. Pour mixture through a strainer to remove most of the seeds (I like a few seeds in the final mix, because it feels more authentically raspberry, but I add back in maybe a teaspoon full). Place mixture back into saucepan and back on stove, back onto about medium heat.
3. Mix cold water with corn starch. Add mixture to saucepan and whisk until thoroughly combined - this might take some vigorous mixing to make sure the cornstarch doesn't clump. Boil until mixture becomes thick, remove from heat. Cool until about room temperature.
4. Add heavy cream to mixture, and beat using an immersion blender to whip the cream a bit, until well combined and a little thicker.

Frosting:
2 c powdered sugar
1/2 c unsalted butter
zest of one lemon (If you don't want really lemony frosting, omit the zest for a more delicate flavor)
juice of half lemon
1 tsp vanilla
1/2 c heavy whipping cream
Remaining raspberry filling (I had about a teaspoon left after filling cupcakes)

Instructions:
1. In stand mixer with whisk attachment, combine remaining raspberry filling, powdered sugar, butter. (The little bit of raspberry filling will give the frosting a nice, delicate pale pink color to the frosting.)
2. Add zest, lemon juice, vanilla, combine again.
3. Add heavy cream and whip on high until frosting gets nice and fluffy. (If it appears to curdle slightly, just whip it a little longer. Chances are pretty good it will actually be pretty smooth when spread with a knife or spatula.)

Assembly:
1. Cut a cone-shaped chunk out of the top of each cupcake (see photo below), then gently cut the point off.
2. Scoop raspberry filling into hole, filling almost to the top, and replace the top of the cupcake (again, as shown). You don't want the filling to ooze out of the top.
3. Pipe frosting however you desire. Top with fresh raspberry! (I was testing out a new tip and I definitely need more practice with it.)


Friday, December 25, 2015

Bring on the Cookies 2015 Edition

This year's Christmas cookies! I was able to use my gingerbread skyline to decorate the plate, which I thought turned out really cool! I will have to remember that for future years.
This year I didn't spend a ton of time making Christmas cookies, although I gave more away than I ever had before, which was fun. I made (going L to R starting at the top):
1. Chocolate Crinkles - it just isn't Christmas without these
2. Homemade Marshmallows (if you've never made homemade marshmallows, do it NOW - coolest science experiment out there, and tasty too)
3. Gingerbread Cookies (this recipe makes A TON - as in 3 gingerbread houses, a gingerbread skyline and about 3 dozen cookies - so unless you want to make this many cookies, half it for sure)

4. Orange/Cranberry macaroons - use this basic recipe and add zest of one orange, and dried cranberries to taste (about half a cup is fine)
5. Spritz
6. Mini Chocolate Chip macaroons (they taste like Mounds bars) - same basic recipe as above. Substitute almond flavoring for vanilla, and stir in about 1/2 cup of mini chocolate chips
7. Fudge (I tried a new recipe. It was super-goopy. I don't recommend it. I'm not linking it.)

Wednesday, December 23, 2015

Buildings of Gingerbread

This year's gingerbread creation - The Emerald City! Why do one house when you could do a whole city?
I still need to figure out royal icing, because this stuff was way too stiff to get very artistic with. Still, though, I think it turned out pretty fun. It is 4 layers of flat gingerbread stacked against each other and turned upright. Decent depth. I am going to have to try this again next year with some more thought and better icing.

Tuesday, December 23, 2014

Baked Architecture

I have been stuck at home with sick kids this holiday season, thus bored.  I decided to try out something I have wanted to do for a very long time: make gingerbread houses from scratch.  I created the patterns and made very simple houses for my older two boys.  Then I decided to make my own mid century modern-inspired gingerbread house.  I am a novice with gingerbread structures, so this was just a first attempt.  And my frosting was not cooperative.  I think next time I might go for a butter-based frosting instead of the traditional royal icing, which was thick and difficult to work with.  Also, to prevent a bunch of frustration, I did hot glue the pieces together initially (all in discreet places that would never be noticed).  And here was my MCM gingerbread house in progress and the final product.  I have to say that I was totally pleased with the way the beams fit into the structure - they were actually quite sturdy and support the roof!  Other tips I can offer: pez make excellent bricks, chocolate neccos work well for that slate-walkway style, and gumballs work great for those globe lights.  If only I could have found a way to suspend the globe light from the roof, that would have been truly awesome.


Monday, October 31, 2011

Baking for Halloween

I have to admit that I am a little bit grossed out (and also intimidated) by cake pops.  The whole mashed up cake mixed with is it frosting? cream cheese? whatever it is...gross to me.  I like the idea, though, of the cake-pop.  Sort of another cute spin on the cupcake concept. 
I came across another cake-pop rendition in the October edition of Martha Stewart's Everyday Food magazine.  Quick word on the magazine: go grab one if you never have.  It's one of those little Reader's Digest-sized ones at the check-out counter of the grocery store and it's full of easy meal ideas.
Anyway, the magazine showed cake pops made using pound cake cut out with a cookie cutter and then dipped in chocolate.  Genius!  I decided to make them for my son's preschool Halloween party. 
Now, I'm not going to lie: these were not exactly easy...and I am pretty sure I over-cooked the pound cake.  But, I think if the opportunity presented itself, I might actually make them again, and I would certainly recommend them to anyone who is, like me, somewhat intimidated by the other kind of cake pop.  They were a hit with the preschool class and I ended up with a few extra ones to give away as cute gifts.  Here was my process:
1. Bake a pound cake in a rimmed cookie sheet instead of a bundt pan.  I used a Food Network recipe for Chocolate Pound Cake.  It tasted like a brownie, by the way.  Very good, even though slightly over-cooked - remember to adjust cooking time to account for the thin cake.
2. After it cools, cut out with cookie cutters (preferably those with smooth edges).
 3. Insert a stick into the cut cake.  If you have room in the freezer, at this point you might want to freeze them for a little while.  I did not have this luxury.
 4. Set up your infrastructure.  Get out a cookie sheet and set a couple pieces of styrofoam (I used that green florist foam stuff) to rest the dipped pops in while they dry.
5. Using a double boiler, or a tempered glass bowl over a pot of boiling water, gently and slowly melt the dipping chocolate.  I used a Trader Joe's brick of dark chocolate and a few smaller bars of their white chocolate.
Note about white chocolate: It's HARD to work with.  Melt it VERY slowly - heat at about half the temp of the chocolate.  Baby it.  The slower you melt it, the smoother it will stay.  If it gets too hot, it will curdle and separate.  When my white chocolate was melted, I added some food coloring to turn it orange and then some orange extract (I'm not a fan of plain white chocolate).
6. Using a small spatula, gently spoon and smooth the chocolate over the cake pop.  This takes a little bit of practice, but works better than just trying to dip the pop into the chocolate.
 7. While the chocolate is still wet, embellish with sprinkles or nuts or anything you might want to stick to them.
8. Let them dry in the open air overnight.
 9. Wrap with plastic (I used those little celophane bags found in the wedding aisle of a craft store).
See?  So cute!  It's definitely a project that takes a couple of hours, but totally worth it for the cute finished product.

Monday, January 31, 2011

Back in the Game!

Pies.  I never liked pie as a kid.  I would always just pass on dessert when it was offered (unless it was chocolate cream).  I don't even know when it was that I actually tried pie with an open mind for the first time.  A few years ago I must have changed my mind, though, because I began making pies - specifically pear pies.  A coworker of mine brought in a pear/ginger pie and I loved it and have made my own version ever since.  My grandparents have a very bounteous pear tree in their backyard and this is usually what I do with the pears they give us.
This past week in our CSA box, we got 6 pears.  I decided I might embark upon pie once again.  It had been awhile.  Over the summer I made a few pies and they were all spectacular flops.  Most were made sort of spur-of-the-moment with whatever fruit/berries I had on hand and experimental pies appear to be a huge risk.  I disappointedly gave up on pie making for awhile.  Usually, since I don't have a lot of time with my two small boys, I just buy store-bought crust and throw together a filling.  My husband is not particular, so it works.  This is complete and total sacrilege to my mother, who insists that one should always make crust from scratch.  She is so insistent that she didn't even want to taste my pie when she found out I didn't make the crust.
I decided in order to get my pie-mojo back, I was going to take the time to make the crust and put some serious TLC into this pie.  I also decided that one of my major hang-ups to crust-making is the shortening.  Shortening is disgusting.  So, thanks to Smitten Kitchen, I found a lovely butter-only crust with lots of very clear, hand-holdy directions. 
I officially declare that I am back in the game!  The pie turned out great!  It took half my day, but it turned out great!  I truly think that pear/ginger is the best pie combination out there.  Pears are so delicate when baked into a pie - they have a texture that is like velvet, BUT they are bland.  Adding some fresh grated ginger gives it a warm zip that is so satisfying.  When I make pies, I tend to just throw a bunch of stuff in a bowl and hope it turns out, but today I paid closer attention so that I could pass this on because I truly believe if you try pear/ginger pie, you will be hooked!
Danielle's Pear and Ginger Pie Filling
6-7 large d'anjou pears (or about 9 smaller ones), halved then sliced
1-2 tsp fresh ginger (you decide how spicy you want it)
1 tsp cinnamon
1 Tbls lemon juice
2 Tbls butter melted
2 Tbls sugar
3 Tbls flour
Combine all ingredients.  Place inside 9" pie crust and bake at 375 degrees for 40 minutes.

Here's the postscript: My boys were very interested in helping me roll out the pie crust.  The older one kept demanding pieces of it to eat (he is a dough-aholic) and the younger one thought it was great fun to eat handfuls of flour or sweep all of the flour onto the kitchen floor.  The picture does not do the mess justice.  A bath afterward was definitely in order.  I do so love kitchen "help."

Thursday, December 23, 2010

Baking for Christmas

I've gone through a couple of rounds of baking this holiday season due to the need for cookies at two different times.  I like to bake lots of holiday treats because it gets the urge out of my system for pretty much an entire year.  I only  make fancy cookies once a year.  The rest of the time, I'd prefer to stick to drop-cookies.
Here is what I've made this year (besides the fudge and peanut brittle recipes below) linked to the original recipe should you want to try them out:
Lemon wreaths & chocolate thumbprints
Chocolate Thumbprint Cookies - AMAZING.  WOW.
Lemon Wreaths - I'm not a huge lemon fan, but these are great.
Salted Toffee Bars - My husband liked them, I thought they were just so-so.
Oatmeal Carmelitas - an old stand-by.
Spritz - another old stand-by.
Soft Ginger Cookies - I like to have a little bit of ginger around Christmas, just a little.  These are great, particularly when rolled in turbinado sugar.

...and...
I have a couple of egg whites left over, so I am contemplating making some coconut macaroons.  (I'm not sure exactly which recipe, but that one looks good.)  We'll see if I actually do, my guess is that someone will get a lovely egg white omelet for breakfast.
One reason I was doing all of this baking was to give a nice plate of cookies to Jason's assistant.  I love putting these things together and I think this one is particularly lovely.

Sunday, October 31, 2010

Boo!

 We were a little lazy in the Halloween-celebration-department this year, but did get around to making some sugar cookies.  A few weeks ago, I was browsing one of my favorite stores ever, Crate & Barrel, when I saw a spider-web cookie cutter (!!!).  My son has been very into spiders this fall (as I believe I have previously mentioned) so I started thinking about the awesome Halloween cookies we could make.  And then, it got even better.  I found these great Halloween cupcake stencils, one of which was a spider.  I had to grab both, of course, and made sugar cookies deliberately so we could try out our new stuff.  I took the easy-route with cookie-baking and opted to sprinkle sugar on the unbaked cookies rather than make frosting.  They turned out pretty well and my son was thrilled. 
The spider-web cookie cutter seems full of possibilities to me.  Can you imagine the adorable super-hero cookies with words reminiscent of the 1970s Batman TV show?  BAM! KABLOOEY!  KA-POW! 

Sunday, September 12, 2010

Baking with Cake Molds

For my younger son's first birthday, I decided he should have an airplane-themed party. Even at such a young age, he is fascinated by airplanes. I knew that he must have an airplane-cake. I started searching for airplane cake molds. Apparently airplane cakes are not very popular. Wilton's website suggested using a cross. I didn't want to do that. Finally I found the perfect mold and luckily enough, it came with a free miniature airplane mold as well. Score! I could make a small cake for the birthday-boy and a large cake for everyone else. The larger of the airplane molds was not very big - not big enough to feed the 12 people invited to the party - so I placed it on top of a 12" round. The smaller airplane cake was placed on top of a 6" round.

I don't have pictures of the step-by-step, but I did learn some important things while creating these cakes. Here's what I learned:
~~I decided to use the funfetti cupcake recipe that I posted earlier, in the hopes that it would translate well into cake. This turned out to be a mistake for a couple of reasons. First, I had to make 6 batches of it by the time I was done. Second, it is a butter-based batter which is fine for smallish cupcakes. They cook fast enough to remain moist. When cooking a larger cake, though, it takes longer in the oven and this really dried out the cake. I wish I had used an oil-based batter instead.
~~I ended up having to make the airplanes twice. The first reason was because I filled the cake pans too full. I should have kept it to less than half-full. The 6" pan above was just under half-full and the cake rose to just over the top of the cake pan. In the airplane molds, I had a huge mess. The little airplane's batter spilled over the sides. I couldn't get the larger airplane's batter to cook completely. When I took it out of the oven after far too much time, it was still a soupy mess in the middle.
~~This led me to the important conclusion that when baking large rounds (bigger than 9") or deep molds, to drop the heat down to 325 and let them bake longer and slower.
~~The last, and possibly most critical thing about baking in a mold is to grease, grease, grease! The first airplanes not only had all those other problems, but they also got stuck in the molds. The first time I used Pam. I had too much faith in it. The second time I used a fairly thick layer of shortening AND then floured the pans also. Both airplanes cooked beautifully the second time around and came out of the molds perfectly.

I used regular M&Ms for the windows on the big airplane and mini M&Ms for the windows on the smaller plane. I also used some chocolate non-pareil-like-candies for the engines on the large airplane and regular M&Ms on the smaller plane. I cut graham crackers into triangles, frosted them and used them as the tails. A note on frosting: for these kind of applications, the frosting has to be fairly stiff. In order to create frosting that was not sickeningly sweet, I added 8 ounces of cream cheese to the butter to help it out a little bit. Cream cheese is also a little more firm than butter. It worked well.
In the end, the cake was a little dry and certainly I've had nicer butter cream frosting, but I feel like when baking for an occasion like this, sometimes taste must be sacrificed a bit for the more artistic final product (in other words, it's really hard to bake a gourmet cake in a cake mold). After all, the one-year-old thought it was fantastic!

Friday, July 30, 2010

Baking from scratch

I was planning on having a little birthday party for my son today and thought I would just make some quick cupcakes last night. I usually make cakes from scratch but thought I had a funfetti cake mix laying around. When I finally dug through my pantry and found five cake mixes, I discovered that all were well past their expiration dates - some as far as 3 years overdue. I have no idea if they still taste good or are safe to eat, but I tossed them all. I guess that goes to show how often I use cake mixes - never! The reason is that cakes from scratch are ridiculously easy and taste a thousand times better. I also keep a stocked kitchen exactly for these kind of circumstances.I remembered seeing a funfetti cake recipe on a friend's blog and so I tried that one out. The cupcakes were absolutely amazing and if you make them, do not leave out the almond flavoring! It makes them even better. The recipe makes just 12 cupcakes, which was also perfect (considering only one friend actually showed up). I topped mine with a simple butter cream frosting. My son requested that it be green. He's three. What can I say?

Thursday, July 1, 2010

Because I love muffins...

I had no idea when I started this blog that I would have nothing more in my life to discuss than food. Perhaps I will have to work on that a little bit. Enter my desire to read an actual grown-up book that is FICTION and does not involve teaching me how to be a better parent. We'll see how long it takes me to read Daniel Deronda. I am a huge George Eliot fan, so I am hoping to love it. Of course, instead of reading it, I am sitting here blogging about muffins. Alas...
So. Muffins. I enjoy muffins as I have previously stated. Not only do I like a good blueberry muffin, I also like a good almond poppy seed muffin. In fact, I think I like poppy seed muffins more, although they get dry pretty fast and are best eaten warm from the oven.
Here is my own favorite poppy seed muffin recipe. I have tinkered with the flour portion similar to before, as you will see. I like this recipe because it is more versatile than the previous blueberry muffin recipe. You can easily omit the almond extract, add some lemon zest and have lemon poppy seed muffins. You could also omit the almond extract, pump up the vanilla and add chocolate chips instead of poppy seeds. Sometimes I like to make a batch, leave the flavorings for last, separate the batter into two or three bowls and make a few different kinds of muffins at once. If a muffin sounds good, try it out...


Poppy Seed Muffins (Danielle Style)
1/4 c butter (melted)
1/4 c apple sauce
(reduces the guilt-factor a bit)
2 eggs

1 c sugar

1 t vanilla

1 t almond extract (or pump it up if you so choose)

1 c milk (buttermilk is an excellent substitute and adds great flavor, but because it is so thick, I'd recommend only using half buttermilk)

1/2 t salt
3 t baking powder

1/4 t baking soda

1 c white flour

1-1/2 c wheat flour

1/2 c oatmeal (or you can make it a mix of oatmeal, flax meal, wheat germ, etc)

poppy seeds to preferred texture (I like lots)


Preheat oven to 400 degrees. Mix butter, apple sauce, eggs, sugar and flavorings together until well blended. In a separate bowl, mix all dry ingredients. Add dry ingredients and milk in 3 additions beginning with flour and ending with milk. Stir until just blended. Add poppy seeds. Pour into 18 muffin cups. Bake for 15 minutes or until muffins are set and toothpick comes out clean. (Watch carefully! If they get over-done, they will be DRY!)

Friday, June 11, 2010

Blueberry Muffins

Yesterday, in an effort to entertain my son, I decided we would make blueberry muffins. We do this fairly often because not only does he love to help bake, he loves to eat muffins. He would eat muffins all day if we would let him (and sometimes it is tempting given his picky eating habits). Since I make muffins so often, and my husband tends to be a muffin-critic not liking anything remotely floury or dry, I have tried a bunch of variations on a couple of recipes and come up with a great muffin. My sister likes to joke that when I make muffins I throw in just about everything. I mainly stick to three grains: wheat germ, flax meal and old fashioned oats (I refuse to buy quick oats, they just seem too processed to me and they have no crunch). I have learned that when I substitute in ALL whole wheat flour, it tends to make baked goods very dense and not so tasty. I've found that adding textured grains to a mixture of wheat and white flour adds texture and some fiber without making the muffins taste anything remotely close to cardboard. I should also note that I do not like bran and never use it. I bought some awhile ago and I personally think it tastes like sawdust and destroys anything it is added to. The cool thing about flax meal, for example, is that it has great flavor, an interesting but fine texture and has lots of Omega 3s which most of us could use more of. I throw oatmeal into most baked breakfast foods including pancakes and waffles. I love it and I find just plain white flour waffles or pancakes (or muffins for that matter) to be a little pasty and sometimes dry. When you substitute meals or grains, they can actually take the place of flour as long as there is a mostly-flour ratio. So, experiment away!
Since this is my own recipe, I am going to share it.

Blueberry Muffins (Danielle-Style)
3/4 c sugar
1/4 c butter (melted)
1/2 c milk
2 eggs
2 tea lemon juice
1/2 c cream cheese (softened)
2 tea vanilla
2 tea baking powder
1/4 tea salt
1/8 c flax meal
1/8 c wheat germ
1/4 c oatmeal
3/4 c wheat flour
3/4 c white flour
2 c blueberries (if frozen, rinse and thaw first)

Preheat oven to 400 degrees.
Mix sugar, butter and eggs. Add vanilla and lemon juice. Whisk in cream cheese until thoroughly combined. Mix all dry ingredients together in a separate bowl. Add half of dry ingredients to wet ingredients, then add half of milk, mix until just combined, then repeat. Add blueberries.
Spoon equal amounts into muffin cups, sprinkle with coarse sugar if desired.
Bake for 18 minutes or until set and toothpick comes out clean.
Makes 12 large muffins or 18 smaller ones.

(Note: I actually ended up under-cooking the muffins in the picture. They should be a little bit more golden-brown coming out of the oven.)

Wednesday, June 2, 2010

Blogging about food

I did not intend for this to be a food blog, and I promise to get to the architectural critique that I am sure you are all (umm...3 of you...) waiting for. I actually have a building in mind in my own neighborhood that I would very much like to discuss, but I am waiting for it to progress a little further before I go take pictures. The problem with blogging about local architecture is that I usually notice it when I am in my car and don't have my camera. While I might make a mental note to get back there, my life does not always allow me that privilege.
Anyway. Food. I have noticed that blogging about food is really popular right now. I confess to not being much of a foodie, although my husband and I do get great pleasure out of trying out new and interesting ethnic restaurants. I mostly view food as a vehicle to repower me so that I can get through the next few hours. If there was a "food pill" I'd probably be all over it. With my two little boys, I really don't have time to be a dinner-gourmet. I am lucky to get through cooking a meal without wanting to run far away from my kitchen. (Why is it that all children become whiny and attention-starved at exactly 5pm?) However, I do like to bake and I love to try new recipes and experiment so lately I have spent a little more time perusing food-ish blogs than I used to. One of these blogs is Picky Palate. She has some pretty amazing cookies/desserts on there and they are all quite accessible, one recently had only 3 ingredients - peanut butter, marshmallow cream and eggs. Yum.
My favorite treat is a chocolate chip cookie. I have always used the same tried-and-true recipe since I was a kid, but lately I have experimented with a couple of new ones. I had no idea what I was missing! My friend Heather has a lovely food blog and seems to like chocolate chip cookies as much as I do, so I tried out the Alton Brown recipe she posted. They were amazing! We loved them! Tonight I tried out an intriguing one I found on Picky Palate that uses vanilla ice cream. Since my husband had been a little grumbly about my grabbing low-fat ice cream, I decided to use it up. They turned out great. I particularly enjoyed eating way too much cookie dough. It was so creamy and had a really nice burst of vanilla flavor. The only critique I can give is that it disappears when they are baked. Here is a little photo-trip of my cookie-making evening...(her photos are WAY better than mine, by the way)

...and Ta-da!

Here are some great food blogs to check out in your spare time (in no particular order):
Picky-Palate
Sweet and Savory Tooth
Jim's Pancakes
Broke A** Gourmet
Smitten Kitchen
Cake on the Brain
The Endive Chronicles

...and for true entertainment, go here:
Cake Wrecks

What are your favorite food blogs?

Monday, May 31, 2010

Birthday Cake (with Berries)

A good friend of mine went to pastry-chef school and makes wonderful cakes for church activities, friends' birthdays, etc. Since I am a believer in baking from scratch, I asked her for her recipes for white and yellow cake. I've made both recipes a couple of times over the past couple of years and they are always big hits because they are SO good.
Today for my grandma's birthday party, my mom and I made the white cake and put sliced strawberries in the middle and around the outside. It was a big hit. I also used the left-over cream cheese frosting from the red velvet cupcakes as the middle-layer frosting. It was a perfect filling. It cut the sweetness of the cake and I highly recommend it.
Here's my sales pitch: cakes from scratch are remarkably easy and taste so much better than box cakes! They have very few ingredients and if you can follow directions, you can't go wrong. When you bake from scratch, you know exactly what's in the final product. Also, cake batter from scratch is amazing stuff. White cake has only egg whites in it, so the batter is incredibly fluffy and quite delicious (if you like batter, that is, my husband is seriously grossed out by the thought of it).
I feel the same way about frosting. Make it from scratch! It's so easy and tastes much better! Here's the cake from start to finish (I wasn't so great at documenting this one since I admit it was an after-thought).

Batter spread into two 9" rounds, and then cooled on wire racks.My son tasting the batter and exclaiming "I like cake!"

The final product: white cake with butter cream frosting and strawberries. And of course, the recipient (with a little help blowing out the candles).
Happy Birthday, Grandma!
È