My middle son came down with a strange rash in mid-January and as of a week ago, we were STILL trying to figure it out. It was the kind of thing that started out small, concentrated to one area (on his rear end, unfortunately), and then spread like crazy. It became infected, and then it just spread and spread until he covered his whole body. It was itchy and painful, and I have no idea how he handled it with as much grace as he did. We went to the doctor SEVEN times over the evolution of the rash. SEVEN. The curious thing was that as it ran its course, the most stubborn part was (so embarrassing) in the shape of a toilet seat on his backside. It just wouldn't go away and it was blisters on top of blisters.

Finally, last week, the dermatologist (by the way, did you know it's almost impossible to get a kid in to see a dermatologist???) decided we should do patch testing to see if he had any skin allergies. Over the weekend, he had to wear this series of little patches (all stuck to medical tape) on his back, then after 48 hours, we could remove them and see if he had any reactions. It turned out, he had a pretty big reaction to something called methylisothiazolinone (abbreviated MI). It is an anti-microbial chemical found in SO MANY THINGS. SO MANY THINGS. After three days, he still has a red square on his back where that patch was. (Incidentally, the doctor ruled the Q15 reaction an "irritant" and not an allergy - probably should avoid that too, and it goes by literally 12 different names in products.)

What seems to have happened is that when he got the rash, I was worried it might be contagious, so I started furiously cleaning all bathroom surfaces frequently to keep the other kids from getting it. The Clorox (well, Kirkland) wipes I was using had this allergen in them and it was actually intensifying the problem. I ended up having to replace the kid-toilet-seat-topper (the one we had was kind of a spongey material that was potentially porous -ick) with a hard-plastic one and change my cleaning routine. The rash began to retreat almost immediately. This allergy also explained why he had had such horrible rashes as a baby when we used ordinary diapers and wipes. We had to move him to very organic stuff early on in life. Only a few brands didn't irritate him. Turns out those brands didn't contain MI. Through the years we have inadvertently shielded him from MI in most things just due to thinking he had sensitive skin and the desire to use organic/natural baby skin products on all of our children - mostly to avoid phthalates, actually. And I also went through and eliminated all triclosan-containing products from our house a few years ago too (scary stuff, it's even in toothpaste).
After the test results, and confirmation of the allergy by the doctor, my research and label-reading began. I thought I would post what I learned here in case there are others out there who learn of an MI allergy. Obviously, it is probably healthiest to make as many cleaners at home from known ingredients like vinegar and peroxide, but I just don't have time for a lot of that right now - life is particularly stressful at the moment, so I needed to be able to purchase things quickly to get us by for awhile.
Here are a few quick things to start with:
1) MI is found in all sorts of soaps, detergents, and skin products mostly.
2) MI is found in a lot of "natural" products, and there isn't a certain brand that I could find that is exclusively free of them - you have to pick and choose and read a lot of labels. Honest Co., for example, is currently being sued for being less than honest about what is in some of its products. I did find, though, that a lot of their stuff is MI-free - in fact, the only dish soap I could find at Target that was MI-free (include Seventh Generation, and Method) was Honest Co.
I spent quite awhile reading labels at Target this morning in the "natural" section and most of this stuff contains MI! So sad!
3) As far as detergents go, powders tend to less-frequently contain MI than liquids.
4) "Sensitive skin" and "fragrance free" products are less likely to contain MI, but not always a guarantee.
5) Sprays tend to be MI-free while lotions tend to contain it.
6) I learned that a lot of cleaning products are very vague as to what is actually in them. They are not required to list their ingredients on labels, so a lot of them don't, or they only list "active" ingredients. Greenworks is a particularly bad offender at false-advertisement. They do list ingredients, but in vague ways that don't actually let you know what chemicals their products contain.
7) Just because it says "plant-based" doesn't mean it is totally safe. My beloved Aveda products (I am so addicted to their smell) have MI in them, I sadly discovered.
I also discovered that quite a few - perhaps MOST - Mrs. Meyers products contain MI. I was surprised and disappointed to see that.
I also spent 20 minutes at Whole Foods reading the labels of all their cleaning products and most of them contain MI, sadly. I think this one makes me the most angry. Look at the claims this container of wet wipes makes, but it still contains MI!
Here are a bunch of products I either purchased today, or had hanging around our house that do NOT contain MI. Note that I am not suggesting that all of these are pure and natural (though a lot are), just that these do not contain this one allergen that bothers my son and many other people out there. This is a pretty broad range of products that are not too expensive and get most of the job of cleaning self and house done.

L to R: Aveeno Baby Lotion (unscented), BabyGanics unscented bubble bath, Trader Joe's handsoap, Honest Co. dishsoap, Seventh Generation disinfecting wipes, Neutrogena Naturals face soaps, Method glass cleaner (in a refreshing mint scent), Method surface cleaner (but note that other Method products like hand soap and dish soap do contain MI), Aquaphor, Trader Joe's plant-based laundry detergent (only has three ingredients!), Dr. Baronne's Castille soap (the lavender stuff smells amazing - I am totally into lavender in the shower right now), Everyone Soap for Every Kid (LOVE the wonderful orangey smell of this stuff), Curel unscented lotion (note that only unscented doesn't contain MI).

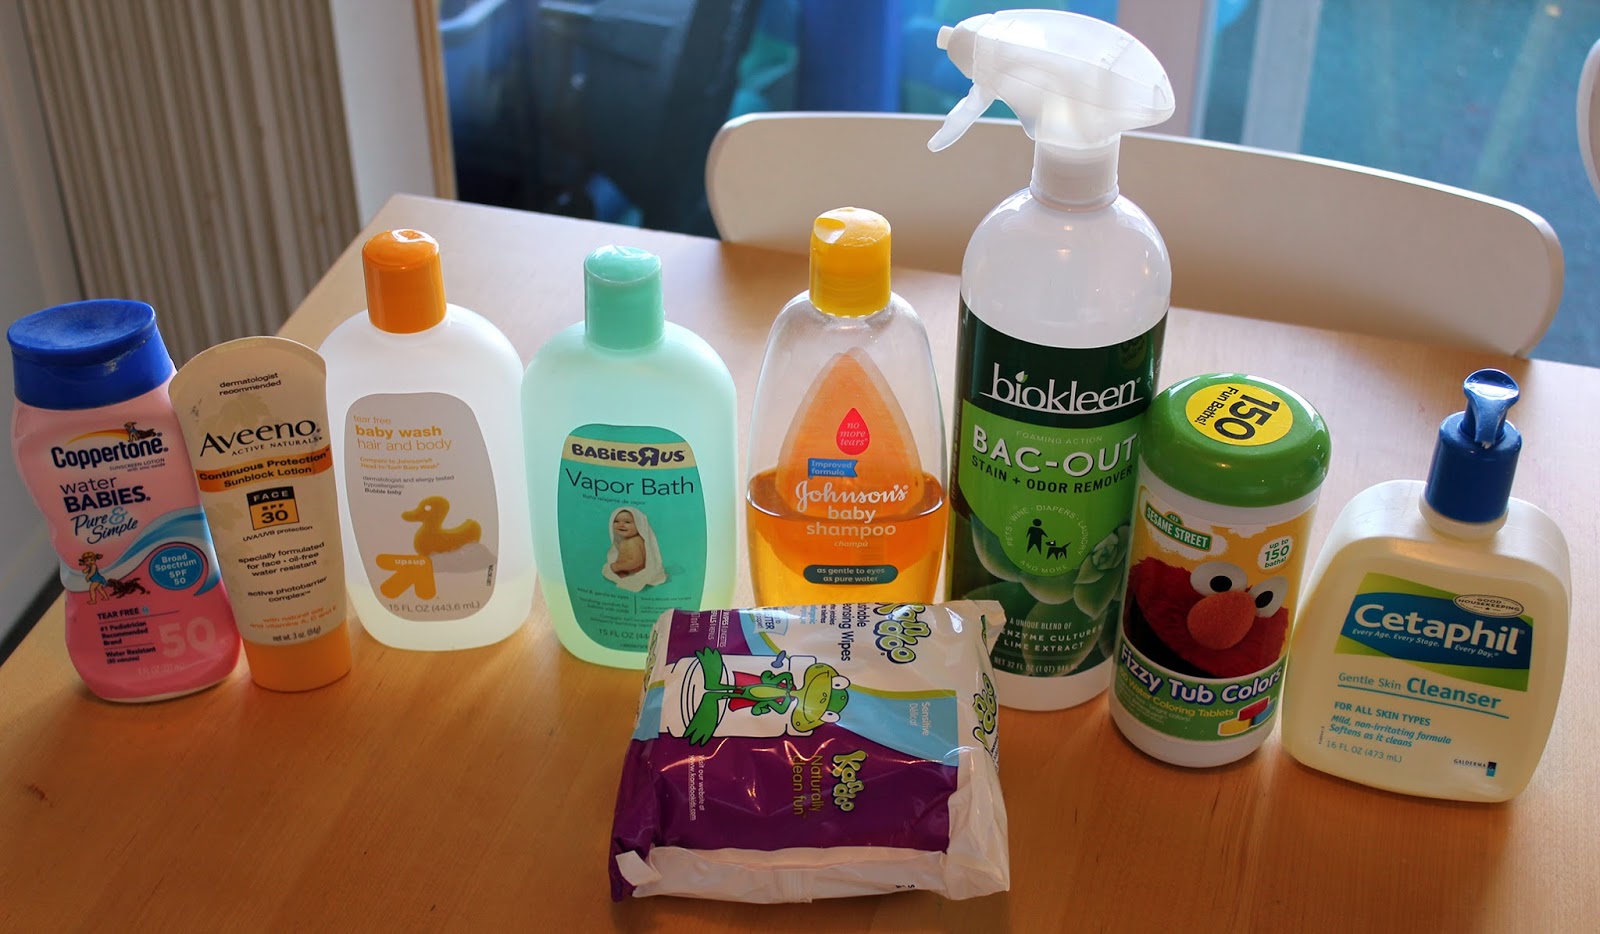
L to R: Coppertone Pure & Simple sunscreen, Aveeno face sunscreen (though I don't like this stuff because of some other chemicals it contains), Target's Up & Up baby wash, Babies R Us vapor bath (great stuff for head colds), Johnson's baby shampoo, Kandoo sensitive skin flushable wipes (only the unscented kind), Biokleen bac-out carpet cleaner (Folex and Resolve do not list ingredients), Fizzy Tub color tabs (hey, what can I say, we went through a phase where that was the only way one of my kids would set foot in a tub without a tantrum), Cetaphil cleanser (awesome stuff anyway, even better that it has no MI).
And here's to many years ahead of obsessive label-reading!